


I shoot a lot of photos and I'm ever-searching for new and creative ways to use them. I've made lacing cards, felt dolls, tote bags, a light-up shadow box, personalized post cards, Poe's gallery wall... well, you get the idea. We have so many lovely photos, I adore seeing them in my everyday life.
As we were making charms out of polymer clay a few nights ago, I had the fun idea to turn photos into clay charms that you can wear or give as gifts. Today I'm teaming up with Canon USA to show you how to make your own at home!
Supplies:
*polymer clay
*craft glue
*clear sealer
*jump rings
*wire or charm pins
*small photos (mine were printed with my PIXMA iP8720)
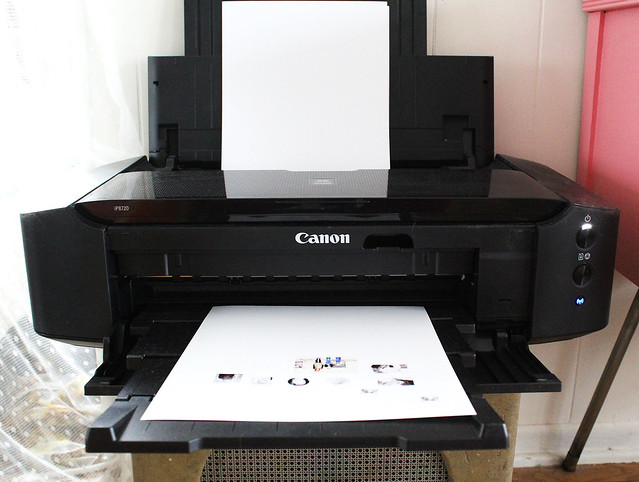
 First things first: choose your photos and print them out. I printed out several options on my PIXMA iP8720 because I didn't know exactly which ones would work the best for this craft. This printer is my favorite I've used because the images always look sharp and I never have any troubles such as jamming or ink smudges. It's a good little (okay, not so little) machine.
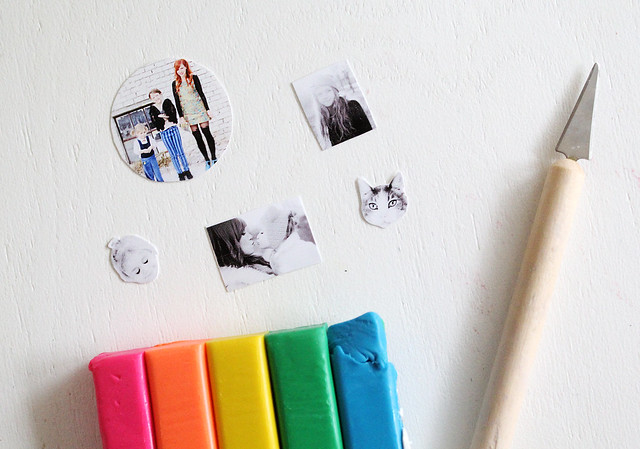
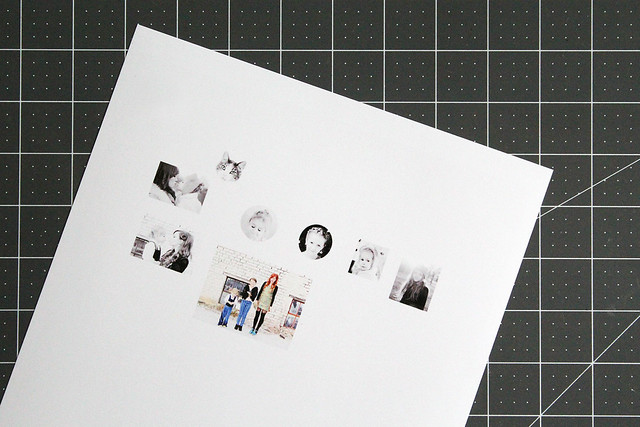
Next, I cut out my photos and got my clay ready. You may have to work the clay in your hands for a couple of minutes before it is ready to roll out. It just depends on how soft it is.
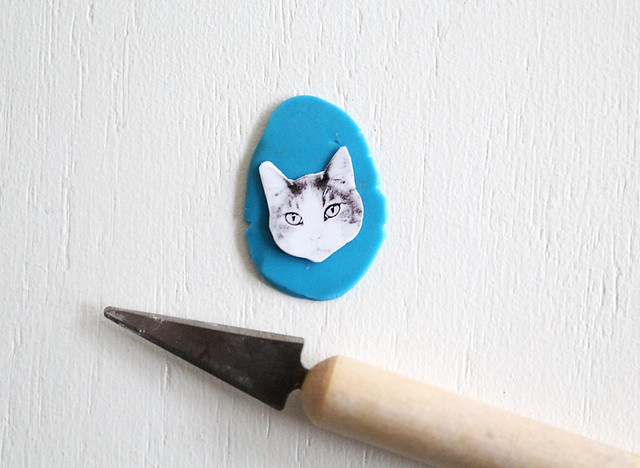
Once my clay was ready, I placed my photo on top of a bit of rolled out clay and trimmed around it.
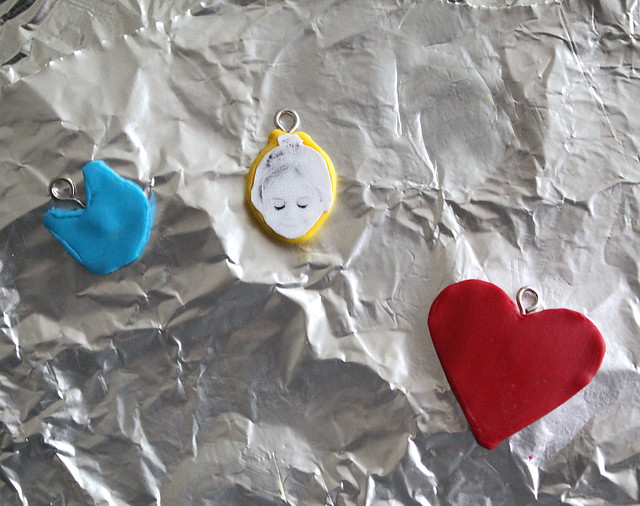
When I achieved my desired shapes, I placed the charms on a piece of foil and carefully removed the photos. I stuck my charm pins into the clay and placed the in the oven to bake. Again, make sure you have removed your photos BEFORE these go in the oven.
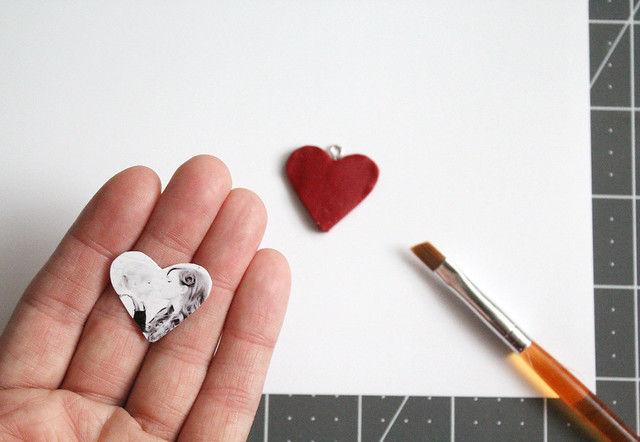
When your charms have finished baking and cooled, use a paint brush or your finger to glue the photo to the charm.
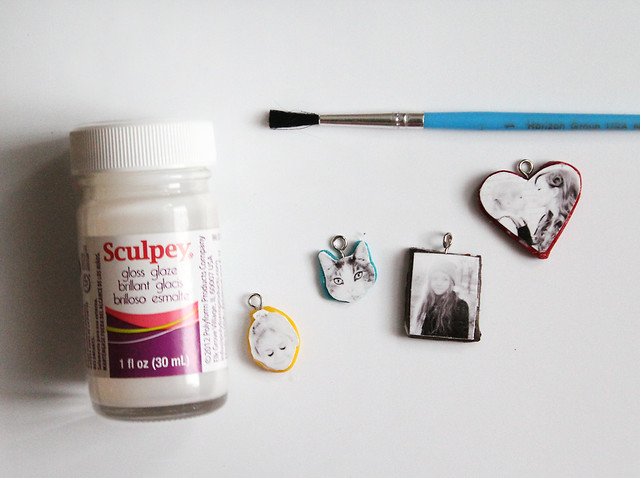
When all the glue has dried, cover your charm (including the photo) in a protective sealer. I also like to use a little dab of super glue to keep those charms pins from slipping out.
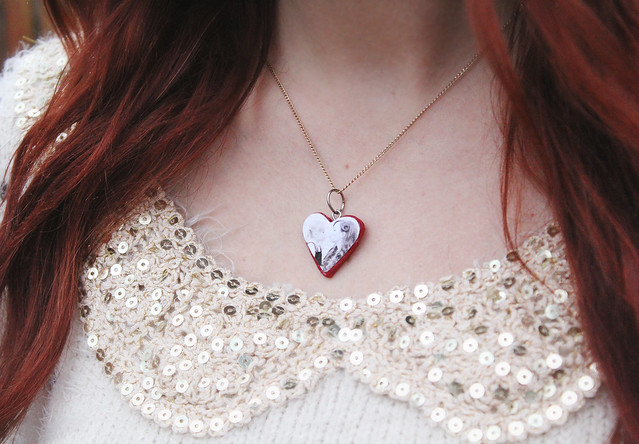
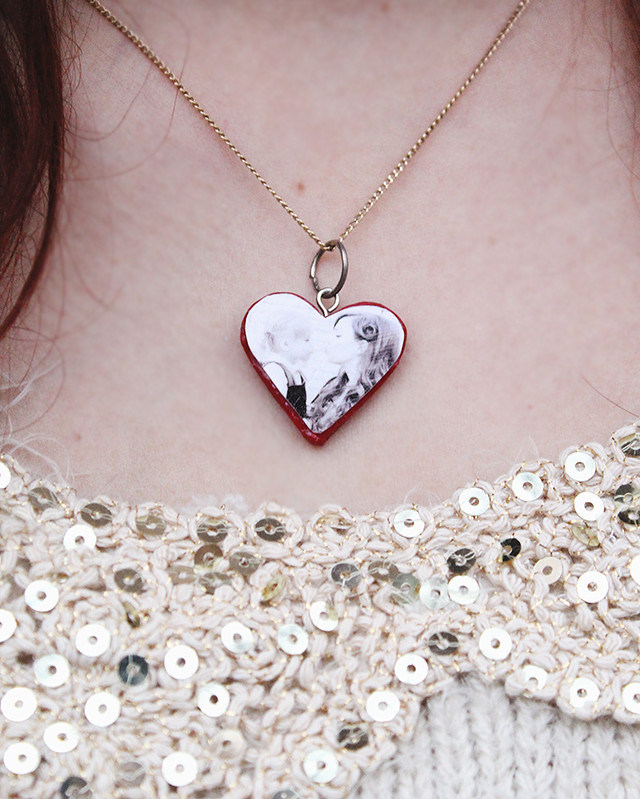
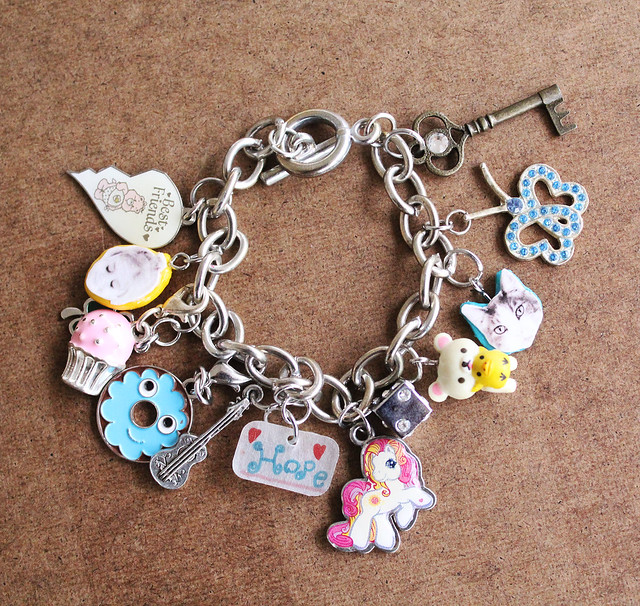
There you have it! This was such a simple and fun way to create personalized charms. I especially love the ones we put on Hope's charm bracelet. Now she can wear two of her very favorite things on her wrist: her best friend and her sweet kitty. xo.

Love this idea! Wonderfully sweet and perfect for an afternoon with my nieces and nephews. Thanks so much. xx
ReplyDeleteI love this! So simple, but such a great idea. I love all your crafty projects, there's so many that I want to try myself, just need to find the time!
ReplyDeletejustmuddlingthroughlife.com
I totally get that! Finding time for all the projects I want to do can be hard sometimes!
DeleteThis is such a cute idea! They look so cute <3
ReplyDeleteWow. When I first saw this, I thought, "Well if you're really crafty and talented..." but after seeing the whole tutorial, this is really simple! I think my teenage girls would love doing this. Thanks for sharing.
ReplyDeletehttp://absolutelytara.com
Awesome! I hope you guys enjoy it!
DeleteThis is such a sweet idea! Also very easy to execute which I love :)
ReplyDeletexx Kathryn
http://www.throughthethicket.ca
Those are super cute! Happy new year!
ReplyDeletelove!
ReplyDeleteThis is such a fab idea! So unbelievably cute! x
ReplyDeleteholljc.blogspot.co.uk
So lovely! That's perfect and so easy to make. Tks :)
ReplyDeletewww.everything713.blogspot.com.br
xo Deborah
these are so so cute! xx
ReplyDeleteWhat a sweet idea!
ReplyDeleteA very lovely and creative idea! I am so pumped to try this out, you don't even know haha <3 have a great day! :)
ReplyDeleteLovely idea and so affortable, well done! I am defenitely going to try this out, you don't even know haha <3 Have a great day!
ReplyDeleteso cute!
ReplyDeletexx nikki
www.dream-in-neon.com
Nice post!:)
ReplyDeleteHappy New Year!
Welcome to: beautymarklady.com :-)
Fabulous idea Katie
ReplyDeletehow do you print pictures so small and with good quality?
ReplyDeleteHi, Susana-- I reduce the size in increments in Photoshop in order to attain higher quality, smaller prints. Hope this helps!
DeleteI absolutely LOVE this!!!
ReplyDeleteHey Katie! How adorable is that idea?! I take fotos all the time and collected them over the years. Recently, I was looking through them again and really wanted to use them for something a little bit different..and there came your post :D The best thing is, that it's so freakin' easy and affortable, I am definitely going to try this out- Thanks Katie! What other materials could you use, instead of clay?
ReplyDeleteI guess you could essentially glue the photos onto any flat charm or surface you wanted, as long as you have the right type of glue. I would be sure to read the bottle before going for it.
Delete