GIRLHOMEABOUTFAQDIYOUTFITSCREATURESSHOP
Showing posts with label home. Show all posts

Friday, April 26

Our Kitchen Renovation Part 2

Kitchen Reno Part 2 Kitchen Reno Part 2
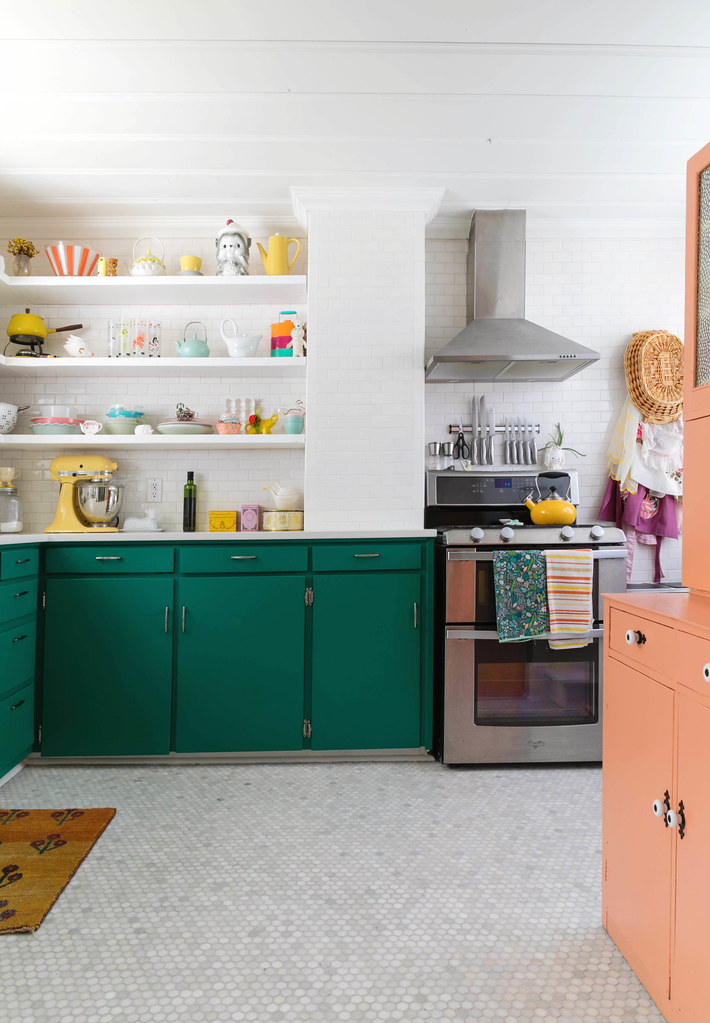
I'm so excited to finally show you our (mostly) finished kitchen! Do you like how I keep throwing "mostly" in there? Are you ever really done dreaming in your spaces? Usually not. In the future we'd like to have a proper pantry built and maybe even take out part of the wall along our back staircase (it lives behind the coral hutch), but that's a whole lot of Phase 3 talk and I'm ready to take a break from kitchen projects for a bit. 😉

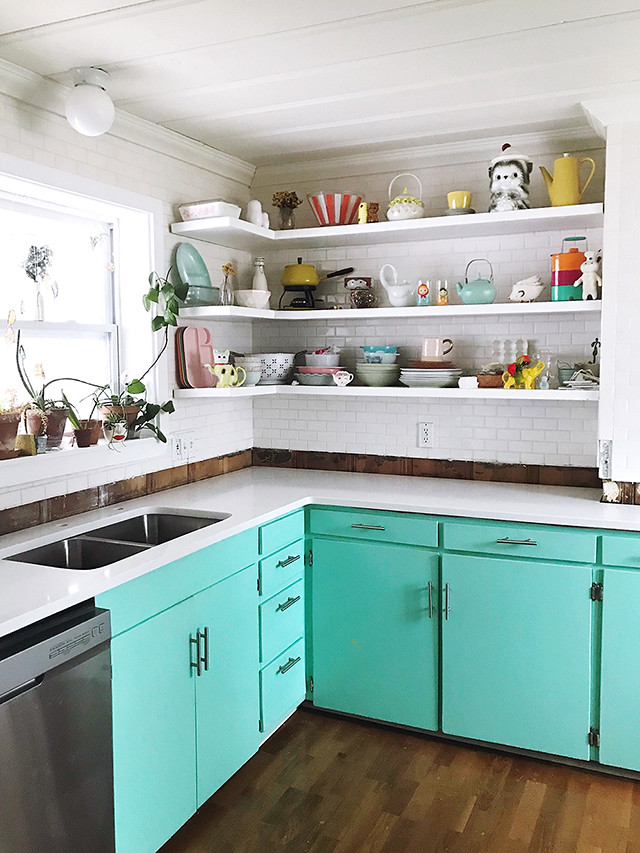
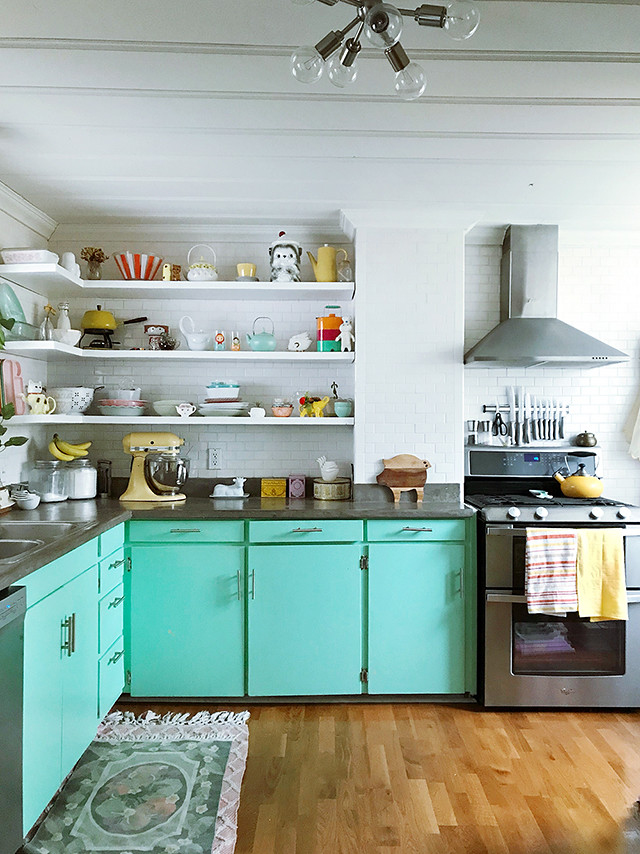
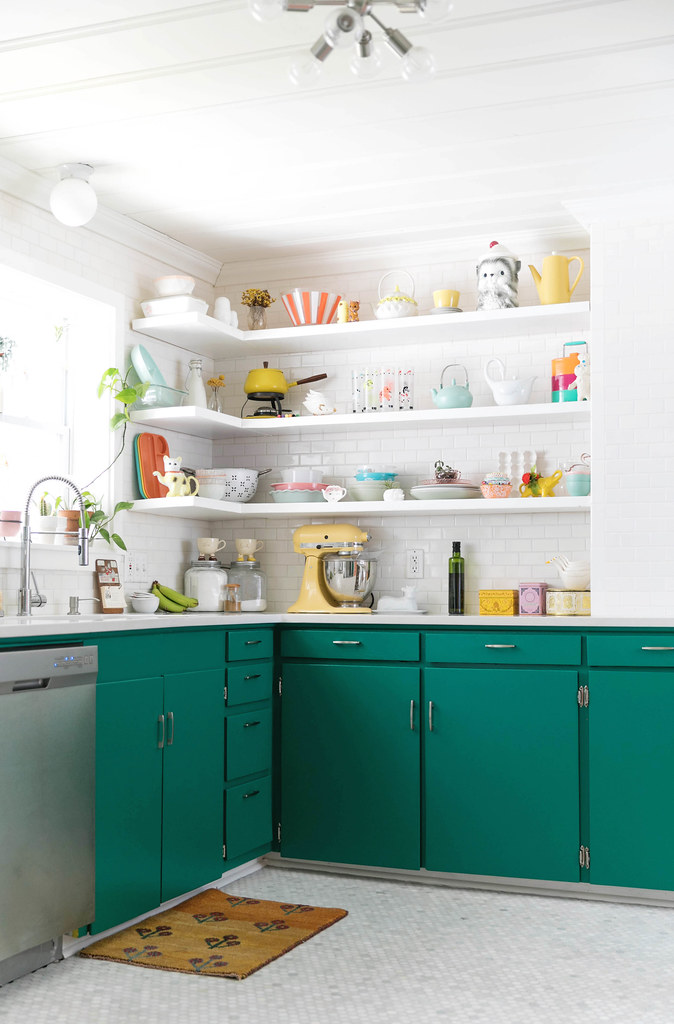
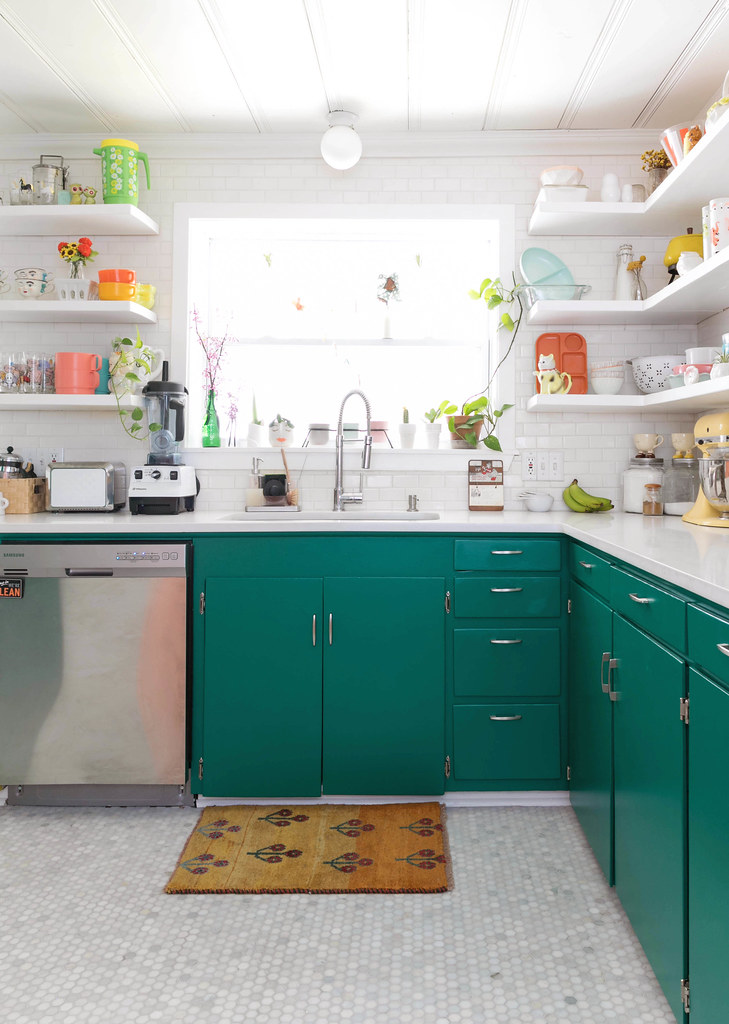
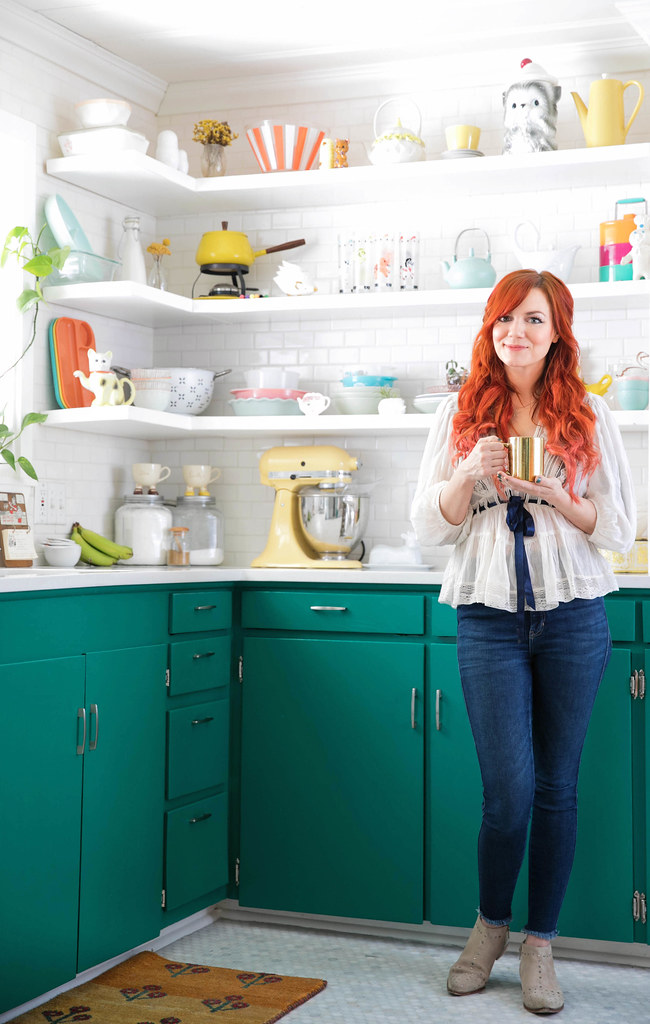
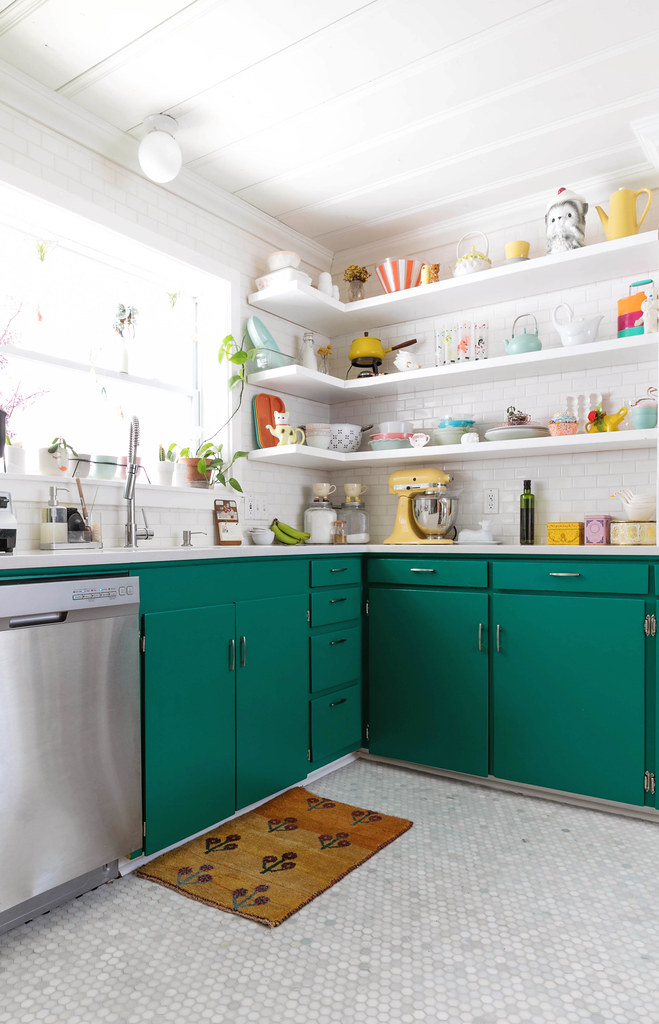
Okay, so getting back to the current state of the kitchen... I'm SO pleased with how everything came together! The counters, the flooring, the new colors: it all feels so fresh and pretty, and it also still feels like ME. Hey, I worry. What if you make big decisions and end up having major regrets? It's a real concern. Anyway, I'm happy to report that I have 0 regrets thus far. That's definitely something to celebrate!

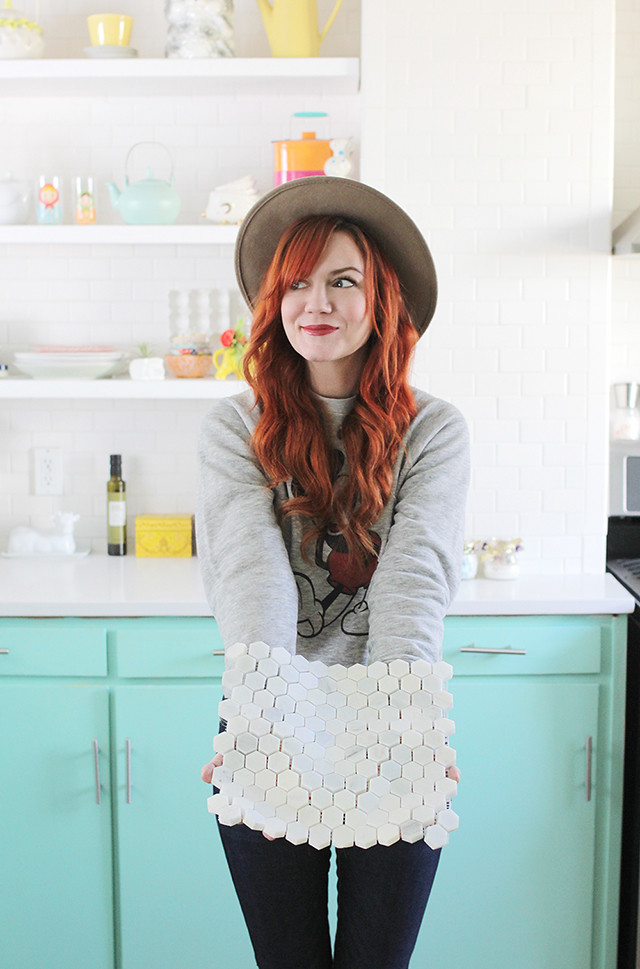
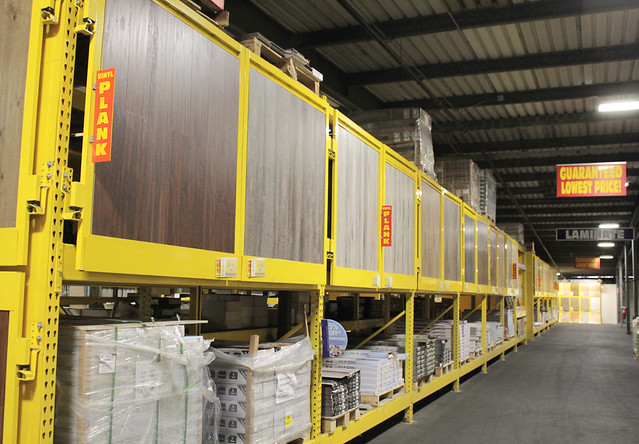
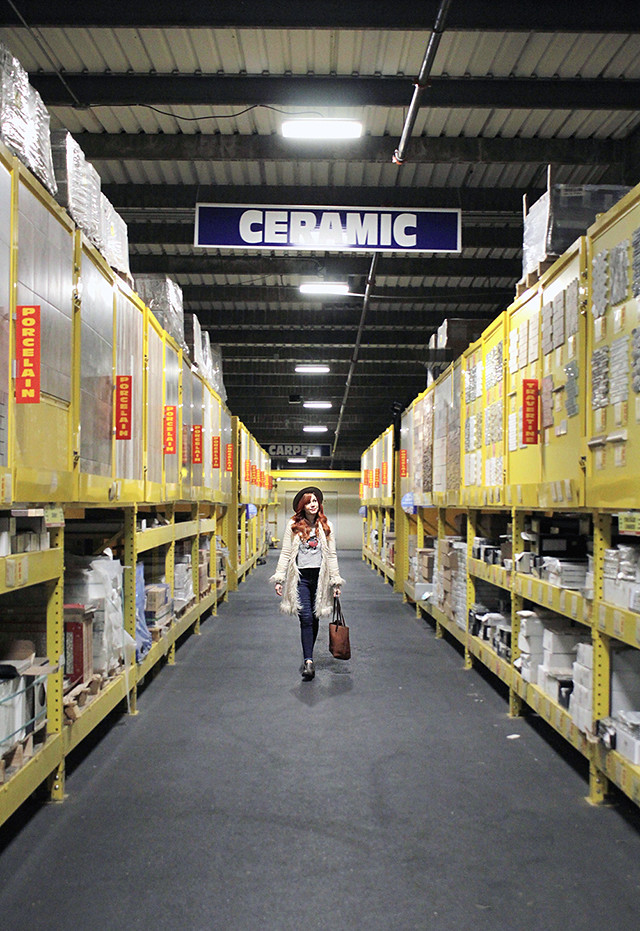
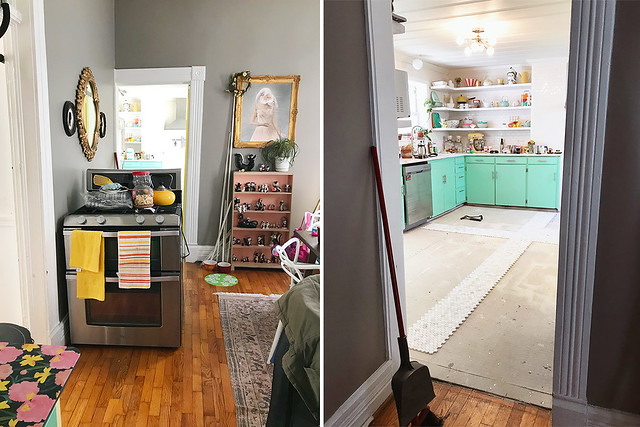
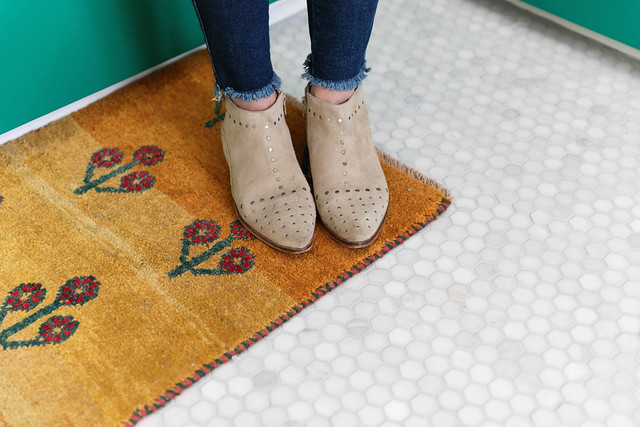
If you remember from my Part 1 post, I partnered with Surplus Warehouse, a home improvement warehouse store that specializes in flooring and cabinetry, for a portion of this kitchen project. I think before I go any further, I should share a little bit of behind-the-scenes. I feel like a lot of times blogs seem to wave a magic wand and there's *poof* a before and after set of pics. Renovation isn't easy, and don't let anyone tell you otherwise. We hired professionals to remove our old counters, install the new ones with a new sink and garbage disposal, lay the tile and grout, rehang and paint the cabinets, and it was still hard. Being without a kitchen for weeks is hard. The rest of the stuff you opt to do yourself to save money can be hard. Obviously it's worth it, but it's still hard. Let's get into our "before" and a glimpse at the process.

Kitchen Reno Part 2 Kitchen Reno Part 2 Kitchen Reno Part 2 Kitchen Reno Part 2 Kitchen Reno Part 2 Kitchen Reno Part 2
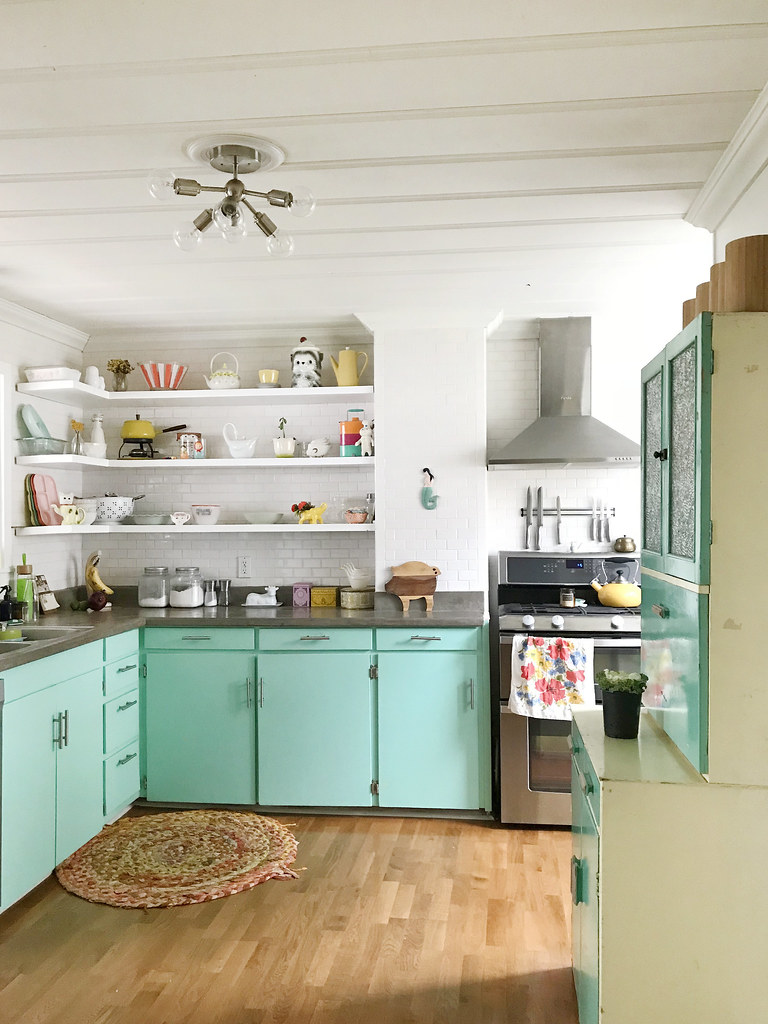
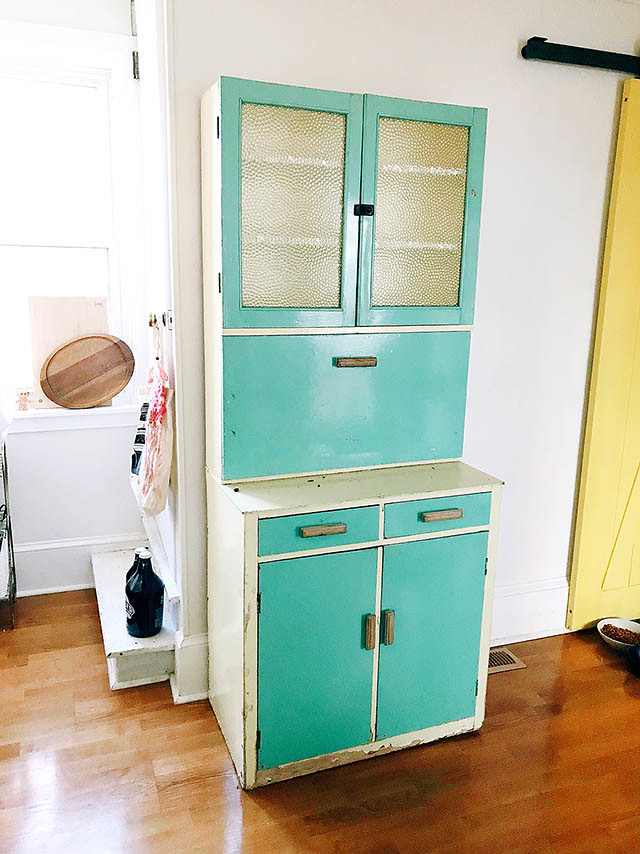
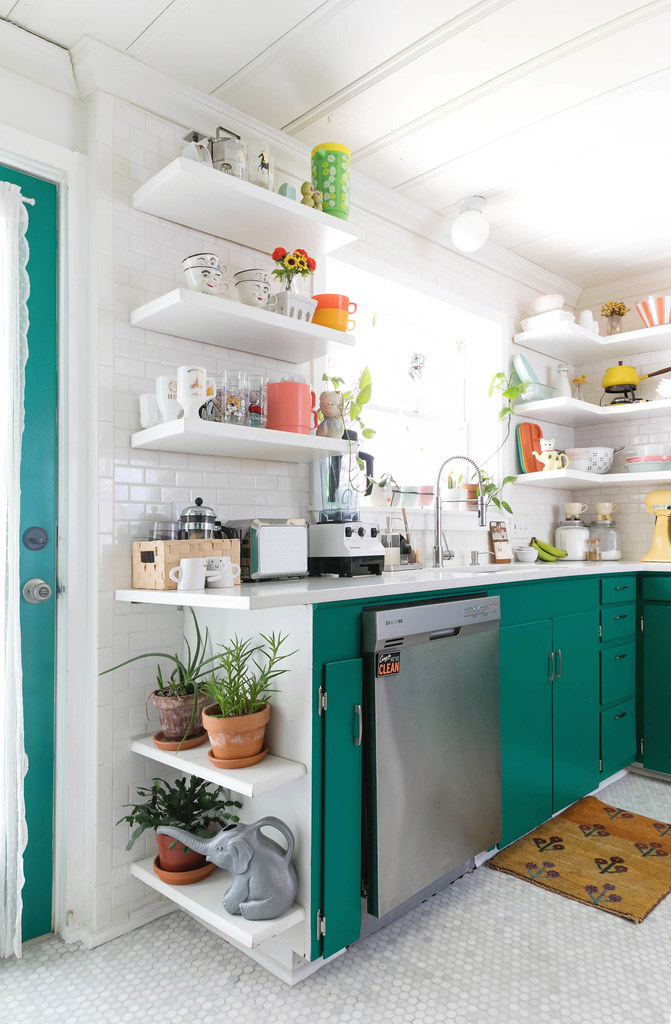
A lot of people on social media were encouraging us to keep the aqua paint color, but if you scroll up, you can see how the new flooring changed the tone of the blue. Always trust your decorating gut. You're the one who lives in the space, not a person on Instagram who thinks made the wrong choice. Because this used to be the A Beautiful Mess studio, I get a lot of push-back any time I decide to change something... even after all these years. I want my home to reflect me, not a sea of strangers with opinions. I don't love this expression, but in this case it's truly applicable: YOU DO YOU.

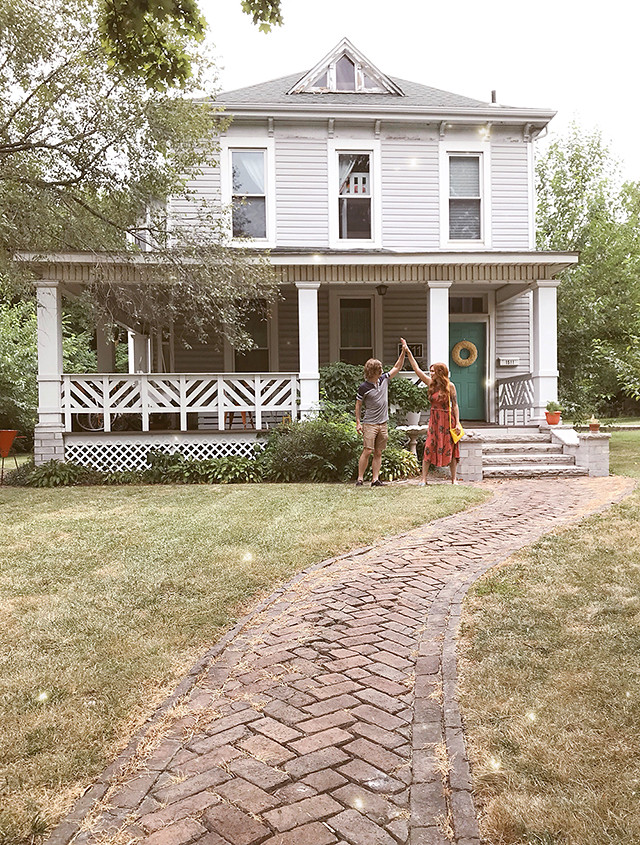
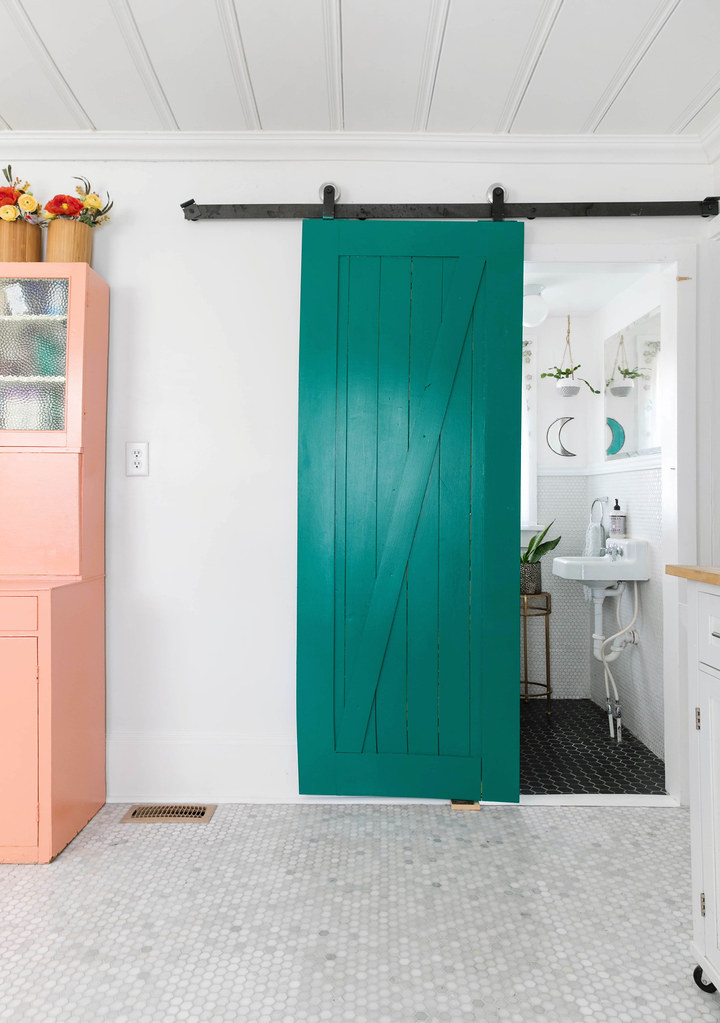
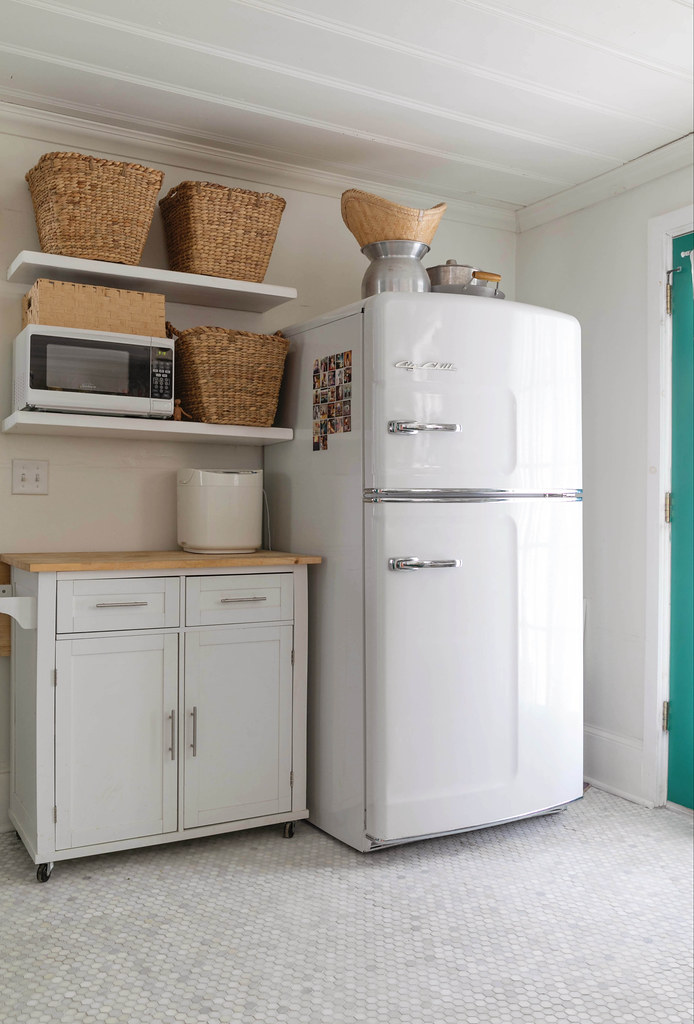
We chose to finish the kitchen DIYing anything we were qualified to do, which was basically just a lot of painting. The yellow barn door, the back door, the hutch, the new quarter round trim, and white walls all needed a fresh coat of paint. Can we just talk about white walls for a sec? They're so fresh and bright and make a space look clean, but the minute you touch up one part of your house, you realize how much EVERYTHING ELSE needs painted. 😂 The struggle is real.

It took us the better part of 2 weeks to finish painting all of those things because, ya know, work and life take top priority. We crested the finish line, though, and now I get to share a gallery of photos all shot by Janae Hardy.

Kitchen Reno Part 2 Kitchen Reno Part 2  Kitchen Reno Part 2  Kitchen Reno Part 2 Kitchen Reno Part 2 Kitchen Reno Part 2 Kitchen Reno Part 2 Kitchen Reno Part 2 Kitchen Reno Part 2 Kitchen Reno Part 2 Kitchen Reno Part 2 Kitchen Reno Part 2 Kitchen Reno Part 2 Kitchen Reno Part 2 Kitchen Reno Part 2 Kitchen Reno Part 2
I want to give a major shoutout to Arthur, the manager at Surplus Warehouse, before I wrap this up. We ended up having an issue with our grout and we couldn't find the same product anywhere in Springfield. He ended up driving to Rogers, AR to get us what we needed. That's a 4 hour round trip just to make sure we had the proper grout. So, as you can tell, it's been a pleasure working with Surplus Warehouse on our flooring. Major thanks to them.

We are SO pleased with our kitchen updates! It has all the elements I was going for: bright, colorful, eclectic with quality products. Oh, and the whole space feels so much bigger. Nailed it!

Now that the kitchen is done, I think I might take a breather from home projects for a bit. It's has been so lovely here in MO lately, I think it's time to get back to the garden. In the meantime, feel free to hit me with any questions you have about kitchen renovations!


Wednesday, April 17

Our Kitchen Renovation Part 1

Kitchen Reno Part 1

Hey, friends! I'm excited to be sharing this big project we've been working on for months! If you remember, last year Johnny and I officially bought this lovely historic house we'd been renting for a couple of years. Our landlords were very gracious in what they let us do to the house as far as painting and wallpapering went, but as any renter knows, you don't pour the big bucks in until you own the home. That brings us to our first official home renovation: the kitchen! I do want to start out by saying that this was already the nicest kitchen in any house I've ever lived in, so it's not that there was anything "wrong" with it. Johnny and I wanted to change some things aesthetically, and in doing that, invest in quality products that would help increase the value of our house.

Kitchen Reno Part 1

We knew we'd have to go in phases because kitchen updates are not always easy on the wallet. Phase 1 for us was having the old formica countertops ripped out and replaced with quartz. If you're curious about the old concrete skim coat, you can find that DIY here. It really was a clever project, we were just ready for something a little more classic.

After the counters went in and the tile backsplash repaired (we hired professionals for all of it), Surplus Warehouse, a home improvement warehouse store that specializes in flooring and cabinetry, reached out to me about working together. Could Phase 2 really happen so quickly? We went over to check out the selection since they are literally down the street from us, and were pleasantly surprised. When you walk in, they have a full, nice showroom. I was instantly excited, and honestly, it makes me so happy to be using a local company for our remodel!

Kitchen Reno Part 1 Kitchen Reno Part 1

We met with the store manager, Arthur, and he took us back to the warehouse and explained a bit about flooring, and let us ask a bunch of questions. For a person who sometimes gets overwhelmed in large home improvement warehouses, I felt surprisingly at ease in the aisles. Everything was clearly labeled so I knew what I was looking at. They even had signs that recommended what types of projects (backsplash, flooring, etc) to use specific types of tile for. That was a big help for me. I've never gotten to renovate a kitchen before and I was a little afraid of making a rookie mistake.

Kitchen Reno Part 1 Kitchen Reno Part 1 Kitchen Reno Part 1 Kitchen Reno Part 1

We took a couple of samples home to see how they felt in our kitchen. After spending way too many days looking at different penny tile design options on Pinterest, Johnny and I agreed on the marble hexagon tile. Ha! Sometimes you just have to really overthink something to come back around to the simpler option. Johnny placed our order with Arthur and we set up an installation date with our contractor! It was happening!

Kitchen Reno Part 1

Here is our "before" photo. Again, I think this kitchen is great, we were just ready to personalize it and make it feel even more like "us". I can't wait to write out part 2 and show you the finished product. Soon, friends!

*Special thanks to Surplus Warehouse for working with us. We're so excited to have this opportunity!


Tuesday, August 14

We Bought A House!

We Bought A House!

These are exciting days here in the Shelton household. This lovely place we've called home for the last 2 1/2 years (we've been renting) is officially ours! It's been a huge goal for us to buy a house for the last year or so, we just had to get ourselves in a position to do so. I get a lot of questions about our buying situation and why this is so big for us, so I thought I'd share more on our past ownership and how we got back here. I'll warn you though, if you're not interested in the backstory, feel free to skip the whole middle section. 😉

Johnny and I bought a home together a year after we were first married. It was definitely a "starter home" that we spent way more years owning than we had originally planned. At this time in our home-owning lives, Johnny worked as worship leader at our church and helped run our youth center (it was pretty cool), and I was a preschool teacher/turned stay-at-home-mom/turned blogger and Skunkboy Creatures handstitching extraordinaire. We weren't flush with cash, but we were mostly getting by and making our life together work, all while still chasing some sort of dream... well, more me than Johnny, but that's a deeper conversation.

Old Blog Photos renegade

As my Skunkboy Creatures dream was gaining traction and keeping me extremely busy, our church ended up going through a split and there wasn't enough money left to support Johnny's position. We were pretty tight on the monies as it was, so losing his job and stability was devastating for us. All around the same time this was happening, I was VERY pregnant and about to have Poesy. We made the decision to move out of our house and put renters in pretty soon after Poesy was born. Long story short (ish), the renters destroyed our house and we couldn't afford to get the house back up to a livable standard before the bank was going to take it. This is how we experienced our first (and hopefully ONLY) foreclosure. I was so embarrassed at the time and felt like such a failure. I had a partner and two children, but couldn't even afford to keep their safe space for living. It honestly took me several years to work through this. But again, that's a deeper conversation to be had.

After all of this sank in, we realized that there was nothing left for us in the town we had lived in for so many years. We actually knew this many years earlier, but after losing any anchor tying us there, it was time for us to find a community more appropriately suited for our young family. We decided that Springfield would be a good fit for us. We already had lots of friends here, since the norm at Lake of the Ozarks is to move away once you are college-age, and we knew the town pretty well since we would visit often. I found an adorable rental in a good neighborhood, and we made the plunge. I say "plunge" because Johnny was born and raised at the lake and I had lived there since I was in elementary school. A change of scenery was good. Very good. Life wasn't perfect, obviously, but we loved that house for 3 years until we found ourselves moving into this beautiful, historic home where we still reside today.

Goals 2018

Now, if you're here for the part of the story where we got back on our feet and fixed our credit enough to buy a house, here it is! I feel especially proud of us for striving hard enough to get our things in order to buy the house we really wanted before the owners were ready to sell.

The first thing we did was SET OUR GOAL. We knew our timeline and what we had to make work, so mapping out how to get there was essential. (We are also NOT planners, so this was big for us. 😅) If you've gone through a foreclosure, there is a specific amount of years that have to pass before anyone is willing to approve a home loan. This was a key part of our specific timeline.

The next big thing was SAVE MONEY. Obviously, this is easier said than done, but we skipped a lot of trips/house upgrades/etc just to keep that money in the bank. This one can be quite a balancing act when you're working extra hard. Feeling like you're doing the overtime but depriving yourself so much that you question why can be tricky. If you're in this boat right now, first remind yourself of your dream and goals, and maybe buy yourself that extra latte if your tired brain needs it. Save the money, but also feed the mental sanity.

Something I didn't know about until I started talking with our lender was CREDIT REPAIR. As you can imagine, Johnny and I didn't have good credit AT ALL when we started this journey. We were scared of credit cards because we didn't want to overspend, and we had a foreclosure on our records. I got hooked up with a reputable credit law firm and they made a world of difference. The cost is a bit different for everyone, but we ended up spending less than $1,000 for the two of us combined and we have seen insane results. They even got our foreclosure removed on a couple of the reporting agencies! I highly recommend this if you're in a position to do so. (The link is to my specific credit law firm, so if you decide to look into them, be sure to ask for Jacquelyn!)

Going back to some of my past fears, my advice is to go ahead and GET A CREDIT CARD. My credit repair contact was the first to push me in this direction, but if the goal here is to build credit, you've got to show that you can spend responsibly and pay on time. This how you build the credit. I mean, we all kind of know that, but as a person who overspent on credit cards in the past, this was a big step for me. My opinion was always that I didn't need credit cards when I could just pay for things on the spot. If you want to build credit, it's essential.

Another thing that really helped me was to GET OBSESSIVE. Download Credit Karma or an app like it and watch your credit climb. It's a great way to stay motivated and feel proud of all your efforts. Honestly, I looked forward to paying my bills every month because I would get to see that number rise. It sounds dorky, but it was very satisfying.

Last but not least, if you're on a pretty tight deadline, it's okay to HAVE A BACKUP PLAN. Even if you go through all the work, it isn't guaranteed that everything will work out as planned. You'd better believe that I spent the last several months scoping out different homes in our area, just incase we encountered an unforeseen hiccup. Thankfully we didn't, but it isn't admitting defeat if you have an auxiliary plan in place. You've gotta take care of yourself and your specific situation/circumstances. 😊

Home
(illustration by Rebecca Lynn Illustration)

Johnny and I closed on our house on July 26th and we're excited to A) own a home after all these years, and B) start planning the bigger projects you get to do when a home is YOURS!

If you're still waiting to get here, I am rooting for you! Sometimes the road can be a long one, but with hard work, it's possible! Whatever your current situation, don't wait to make your space feel like your own. We had especially great landlords that let us do a lot more than most would, but there are lots of ways to make a house feel like home... even if you're currently in limbo. 💛


Wednesday, July 18

Introducing A Little More Structure In Our Day-To-Day

Daily Checklist
I was looking around my house after a weekend of traveling for work, and I felt this sense of defeat wash over me. The table was covered in clutter. There were shoes in literally every room. The entryway looked like someone's messy closet. It's a bad feeling to live in such a lovely home and not want to be there because you don't feel like nagging at your kids for the billionth time. Sure it's summer so they're home more and using our spaces more, but this house was just spotless 2 weeks ago.

So. I let myself acknowledge exhaustion and I wallowed for what felt like an appropriate amount of time, and then I did what I always do: assess how I can address the problem and RALLY. So here we are. We are a family with daily checklists, and I'm pretty excited about it.

Daily Checklist
This was my first time ever trying out Adobe InDesign, so one day I may look back on these and cringe, but for my first attempt I feel pretty good about these checklists. I jotted down the things that I'm constantly reminding the girls to do (I'm not exaggerating by using the word "constantly") and then added a few things they could pitch in on. I put them in frames so they could be used daily with a dry-erase marker, that way I don't have to print out a batch every week!

I know some people may balk at the "bonus" boxes on their checklists, but we don't do weekly allowances and I thought it may be good motivation for them to earn some money and pitch in on things they usually groan about.

Daily Checklist Daily Checklist
Hope has actually been doing a stellar job of keeping up with her own personal space, so her list was more about helping her maintain all the hard work she put into getting it there. Seriously, it was a month-long process to unearth her bedroom from all the junk she had let pile up and I've been really proud of her for keeping up with it.

When you peep her list you'll see 2 boxes for "clear table spot". That's because she often eats 3 meals a day at home and I want her table space clean at least by lunch and then after dinner. If you couldn't tell, keeping our dining table cleaned off is a huge struggle in our house.

Bedroom Makeover Bedroom Makeover Bedroom Makeover
These photos of Poesy's bedroom aren't current, but I think she can get back to this... AND do it on her own. I really want my girls to take ownership in their spaces and treat them with pride. We'll see how it goes. So far, Poesy has taken out the trash, recycling, and is waiting for a load of laundry to fold while I'm typing this. If nothing else, at least I know money talks with this girl. 😂


Tuesday, July 18

Styling Plants Around the Home

Plants
I think at this point most of us can agree that plants bring a fresh and calming element into the home... not to mention the fact that they're extremely addictive.  I enjoy seeing how others style plants around the house, so I thought I'd share some of my favorite green spots!

Plants Plants Plants Plants
My favorite way to display smaller plants is in a fun grouping.  I love collecting fun planters and mugs and mixing them in with more traditional pots.  Throwing in little unexpected touches like this wooden bonsai tree from Under the Shade of a Bonsai Tree and the vintage kid's "chow chow train" are so much fun to me!

Plants 
Snapshots Plants Since my living room is starting to feel like full on crazy plant lady status, I like to balance out my quirky vignettes with some more uniform and traditional groupings.  Basically, that's just so I can add allllll of the fun displays my vintage loving heart desires!

Plants Plants
I do tend to keep the dining room and bedroom a little more traditional, so I guess I go a little extra overboard in the living room.  ðŸ˜‰

Plants Plants Plants
I get asked a lot where I find a lot of my planters, baskets, etc. and the answer is almost always SECOND HAND SHOPS.  Places in your town like Goodwill or smaller thrift shops are usually great for $0.25 baskets and fun mugs.

Oh, and there are some places in my house where I'm not above styling with fake plants.  If there are places where I continue to kill plants over and over, I'll get some plastic guys to round out the bare spots.

I hope this was a fun read!  I just love seeing other people's home decor style, so if you have any links to yours, please leave them in the comments.

Also!  One more thing: one of our future projects might be white washing our bedroom floor.  You can see how rough it is in the photo above-- we have quite a bit of that happening.  Have any of you had good experiences with a project like this?  I need a good push!