


As promised, here's a tutorial for how I made Hope's emoji costume. We were moving houses the weekend of Halloween last year (terrible timing for a DIY mother) and I was still wrapping this thing up as the sun was going down ON Halloween. We made it in time for trick-or-treating, though, so all was good!
Supplies:
*yellow fleece or felt
*red and black felt
*elastic
*stuffing (polyfil)
*scissors, pins, sewing machine
*craft glue (optional)

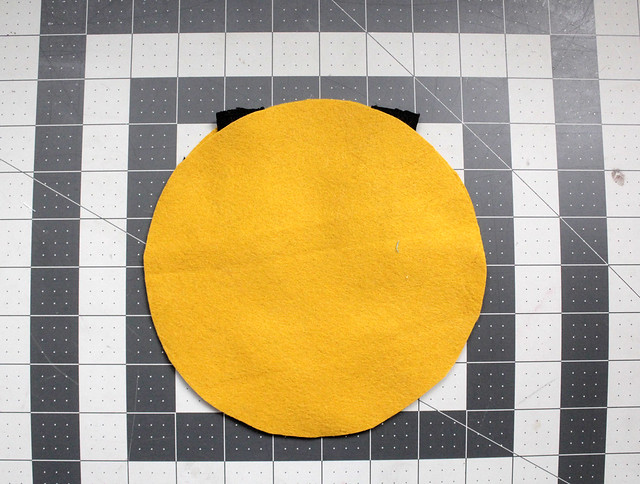
To begin, cut four matching circles from your yellow fleece or felt. These can be whatever size you want, depending on who you're making it for. When it came to Hope's costume, we decided bigger was better!
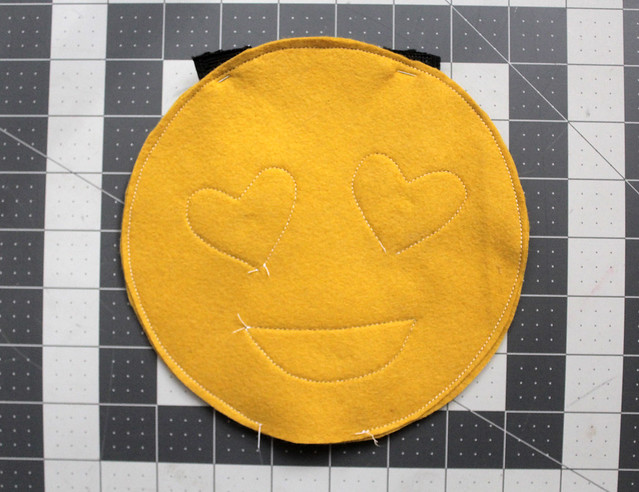
Now, set side three of the circles and cut your emoji face from the felt. Obviously you can switch this up and make whatever emoji face you prefer, but we're a heart eyes family over here.
Once you have the eyes and mouth cut, either pin them in place or use a bit of tacky/craft glue to secure. Take it to the sewing machine and sew it all in place. **You'll see I used contrasting thread in the steps as we go, I would definitely recommend matching your thread color to your felt color for a more polished look!
 Once your eyes and mouth are secure, pin the elastic to the front of the face as shown above. Lay a second felt circle on top of that and sew all the way around, leaving a hole at the bottom big enough for your hand.
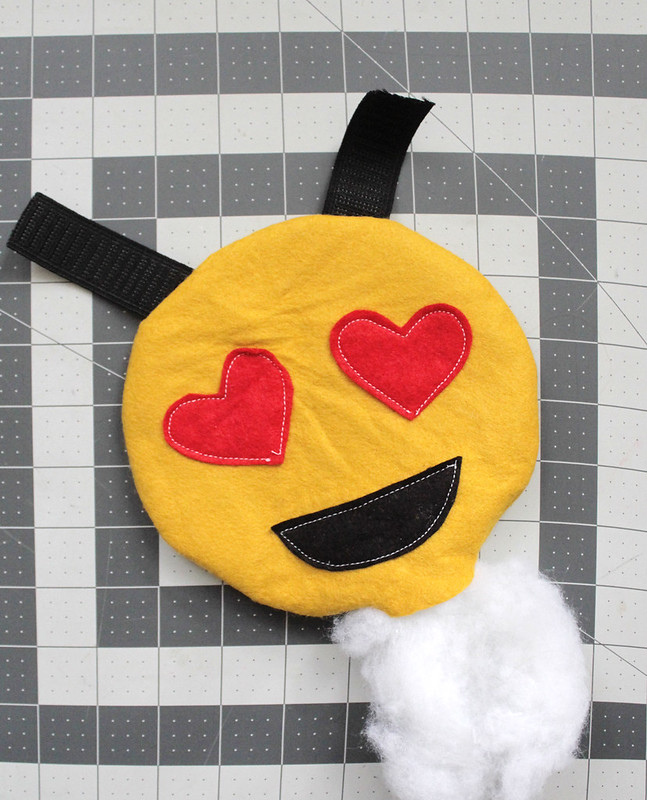
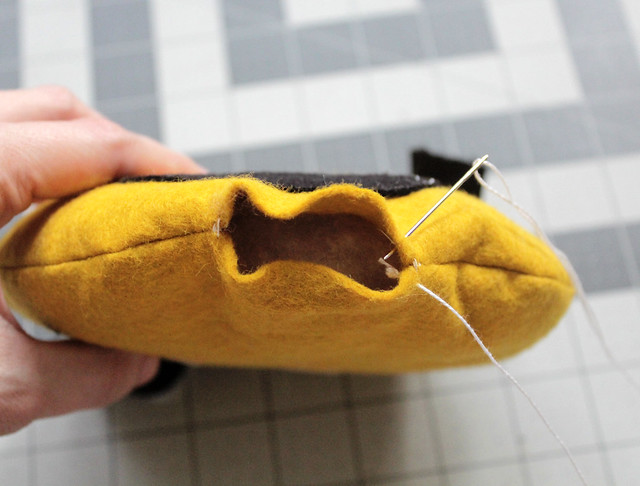 When you've finished stitching most of the way around, flip it right-side out and fill with stuffing. Ladder stitch the opening closed by hand. There! You have your first half finished!
For the back half, sandwich your circles like we did on the first one, leaving a hole the same way in the bottom. Flip right-side out and stuff.
Now for the part that's a little different than our first one. Pin the elastic into the opening as shown above. Do a very tight ladder stitch by hand to fasten the opening closed. Take your time with this part because you want it to be very secure so it doesn't rip out when it's being worn.
Once you've finished hand-stitching, you're all done! It should look something like this:
There you have it-- a big, squishy emoji you can wear! The nice part about this costume is that after you are done with it, you can easily remove the elastic and sew it into an over-sized pillow!
This costume was a big hit with all the trick-or-treaters last year. Now, somehow I have to outdo myself again this year and whip up a spectacular costume for Hope-- I just need her to decide what that will be! Wish me luck!

That's very cute! Look forward to seeing what you'll make this year:)
ReplyDeletewow..lovely.. Great idea.. emoji costume is really very cute. thanks for sharing I am gonna try this for sure :)
ReplyDeleteAssignment writing service reviews
Wow Katie m, this is so cool. Love that it's a happy costume. Definitely going to have a go at this. I had to make a fun time Freddy and Bonnie puppet from five nights at Freddy game. It's a kids horror game my son loves. I'd never made a puppet before so it took the most of last weekend to do, and his Freddy costume I made from remodelling a sailor dress up outfit. I had a blast doing it, but had to do it all freehand from a picture. I'm inspired to keep creating now. Love your blog and your cute skunk boy creatures- they're Devine. I can't wait to see what you create fir Hope this year.
ReplyDeleteCheers from Australia 😀
Emoji costumes...that's really funny...Anyway I like emoji designs over here. It is very creative and looks great...
ReplyDeleteEssay writing service