


Lately, I've been trying to think of ways to freshen up Hope's space. I remember being 12 and feeling very particular about the way my room was arranged and decorated. No, I didn't have great taste, but it was my room and I wanted it to reflect my loves and interests. Sometimes it's hard for me to see Hope as being this old, but I have extremely vivid memories from this age, so I've been trying to put myself in her shoes and help her develop a space she loves.
I thought it would be fun to create a personalized piece of art for Hope's room. The concept I came up with was easy: send Hope around with my disposable camera to shoot photos of things she really loves and DIY something special for her. Today I'm teaming up with Canon USA to show you a fun and easy, super personal DIY for any age and any room!
Supplies:
*Printed photos (I printed my disposable camera photos from a disk with my PIXMA iP8720)
*Scissors or a rotary cutter and self healing mat
*Ruler or straight edge
*Felt in any color
*Craft glue
*Needle and thread or sewing machine (optional)
*Quilt binding
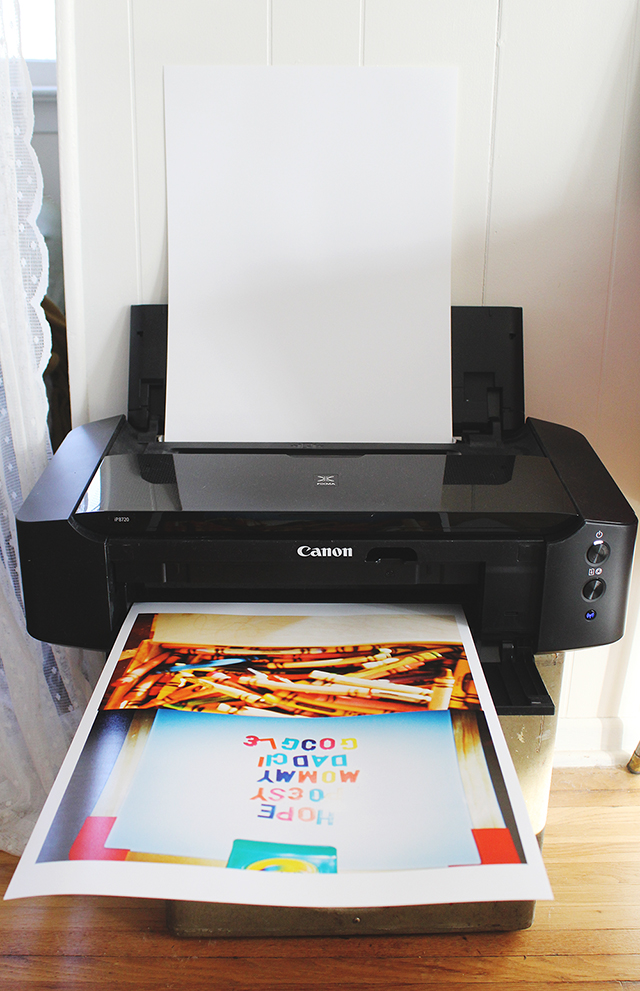
First, I chose which photos I was going to use from the photo disc, and changed the size in Photoshop. My photos were about 9"x13" each. I doubled up the photos on each page because I was using 13"x19" paper. I printed them off with my PIXMA iP8720. I love being able to print extra large photos with this printer. It saves me a ton of time.
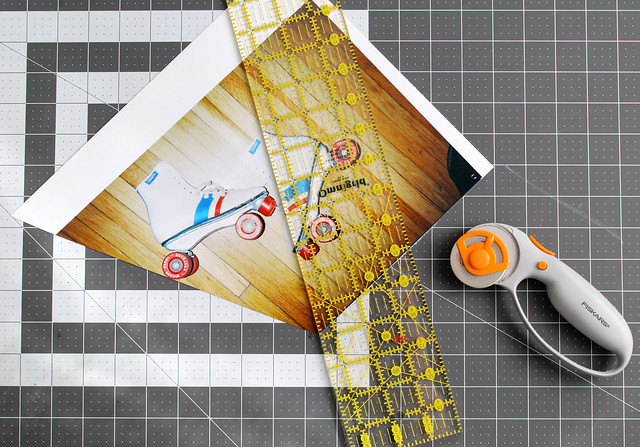
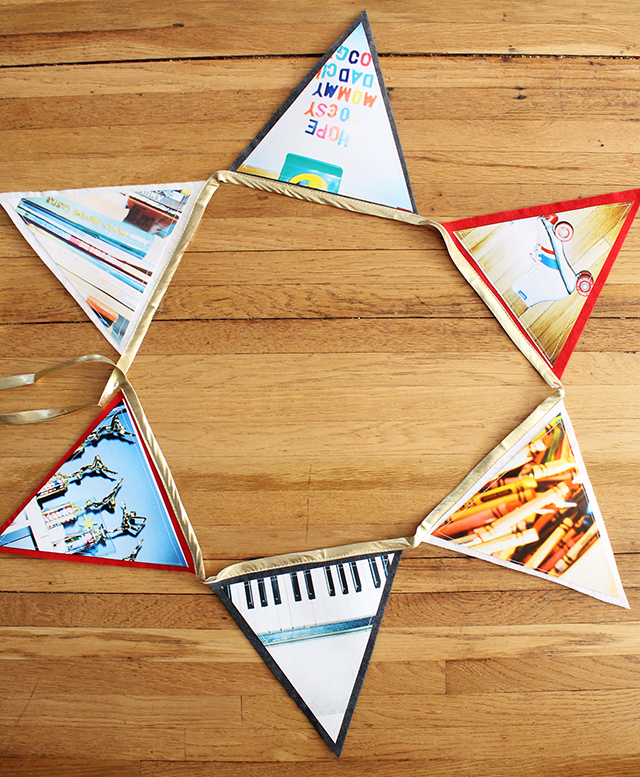
After my photos were printed, I used my straight edge and rotary cutter to attain a properly sized triangle.
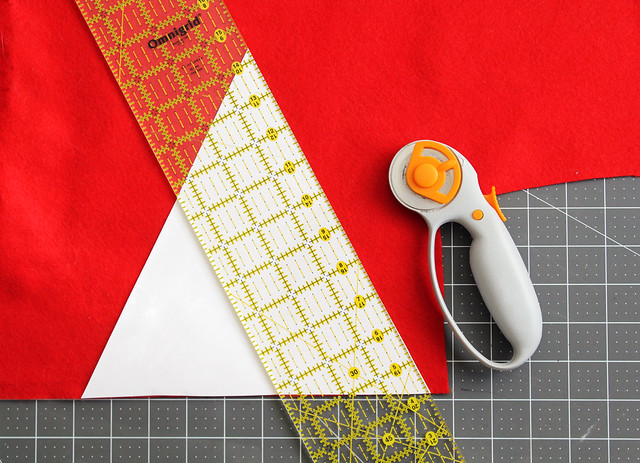
I used the first photo I cut into a triangle to create a pattern for the rest. I used that pattern to cut out triangles of felt in the same size. After I had everything cut, I used my rotary cutter to chop off the top 2 inches of each of the photo triangles so they would sit inside of the felt triangles.
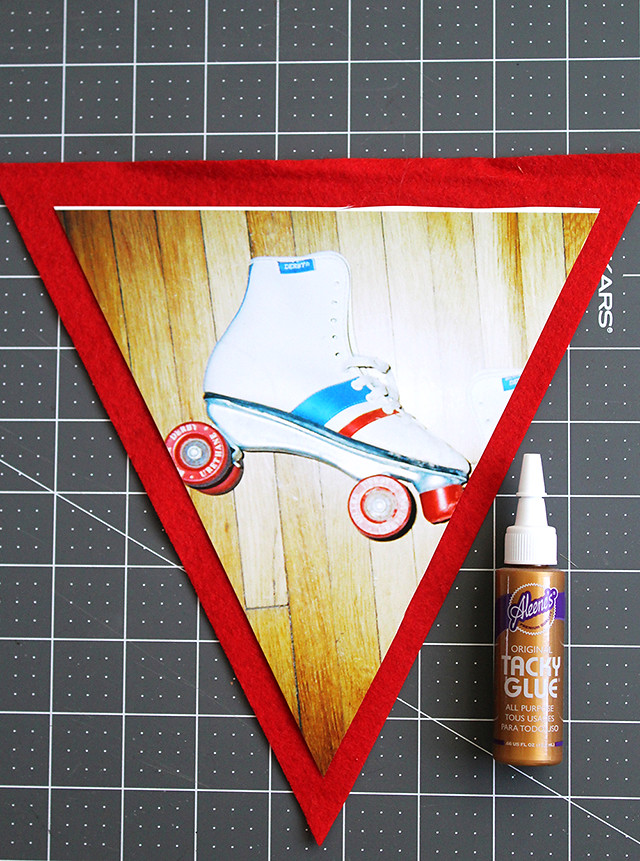
Next, I used my Tacky Glue to tack the photo to the felt. A dot in each corner works great if you are planning to move onto the next step. If you are skipping the sewing part, I suggest gluing the photo entirely to the felt.

If you are, in fact, planning to move to the next step, here it is! After your glue dots have dried, use a long straight stitch to sew your photo to the felt. It is surprisingly easy to stitch up photo paper! I'm brainstorming more paper/sewing projects because I was so happy with the result! You can also stitch this by hand if you aren't comfortable with a sewing machine. These would be really pretty with colorful embroidery floss.
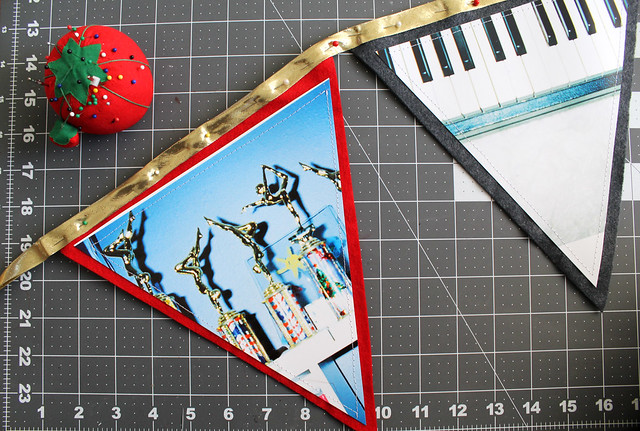
Once all of the triangles are stitched or glued together, grab your binding and pin it to the top of your triangles. Again, if you don't feel like sewing, I suggest gluing this as well. I think it will still turn out wonderfully!
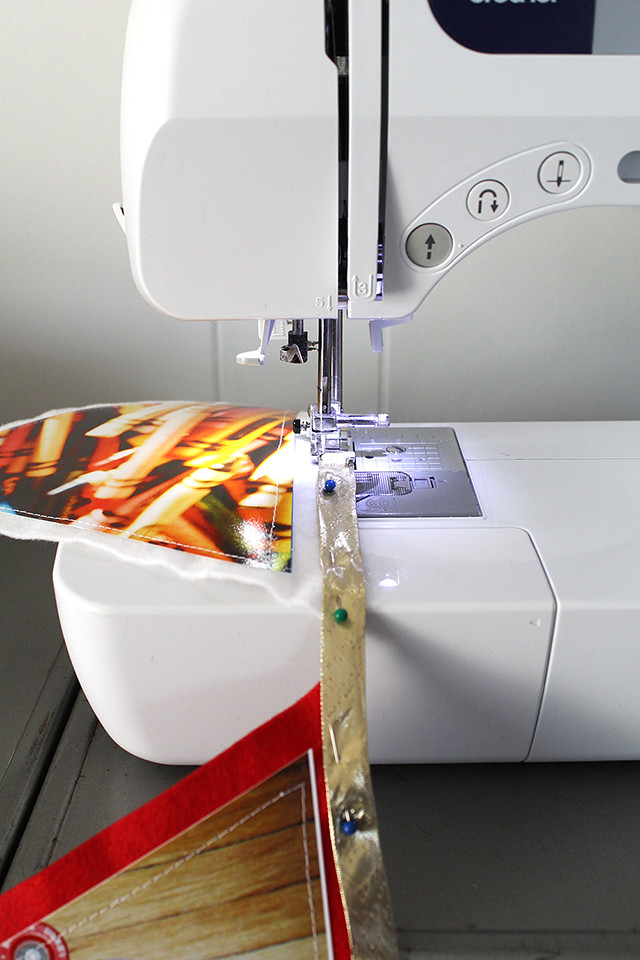
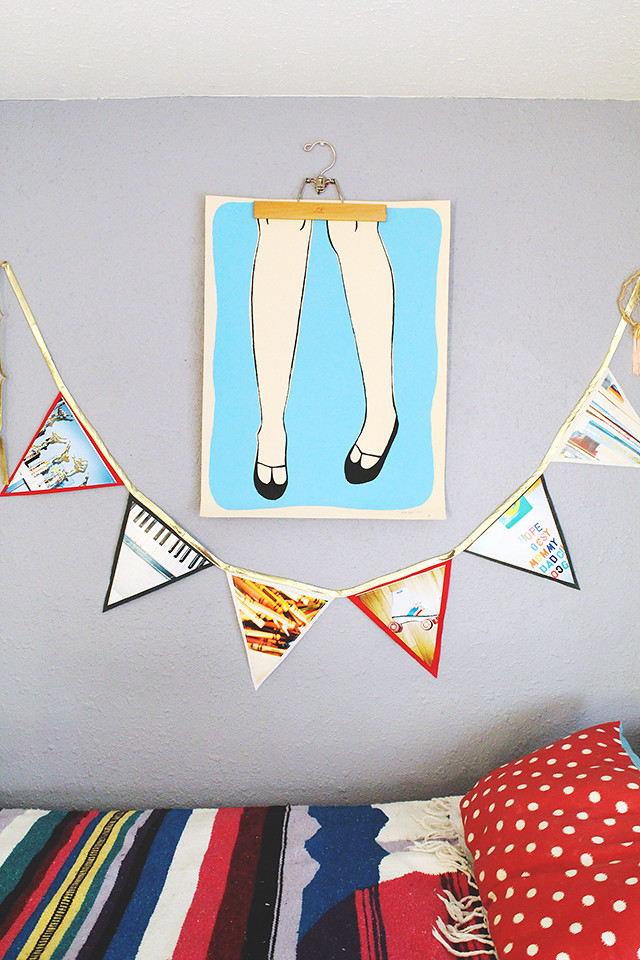
Using a long straight stitch again, carefully sew your binding to the triangles. When you reach the end, you're all done! Find a place to hang this treasure!
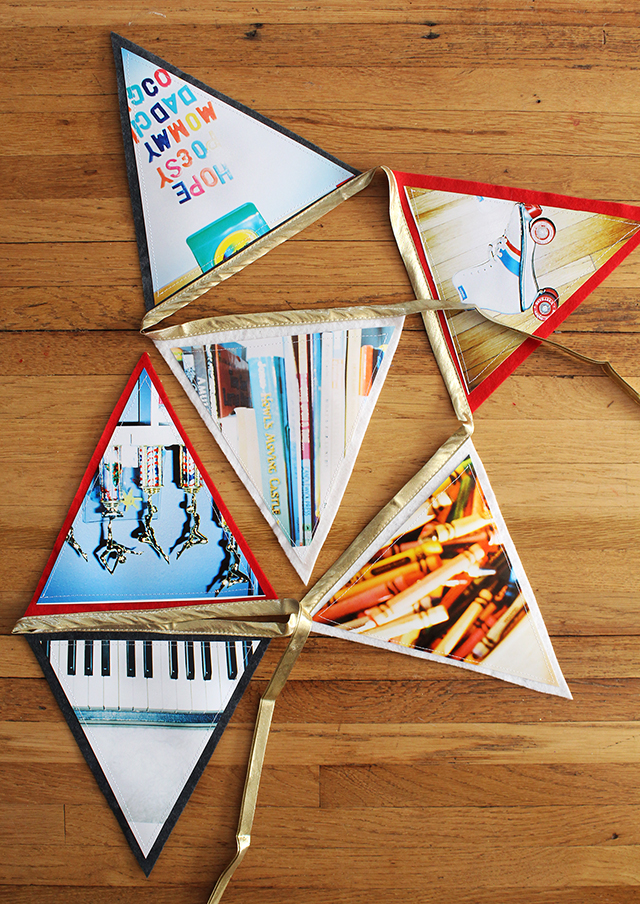
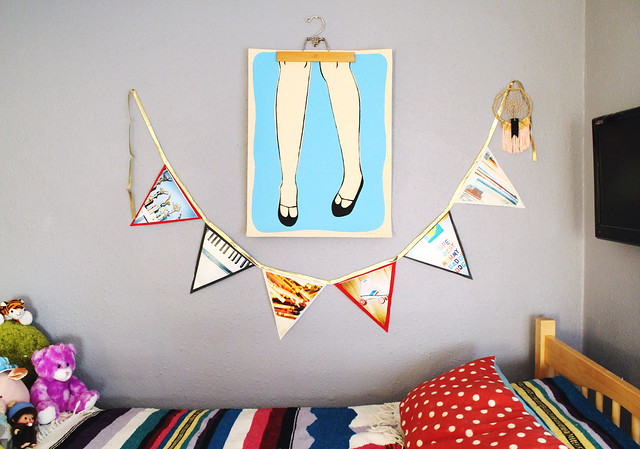

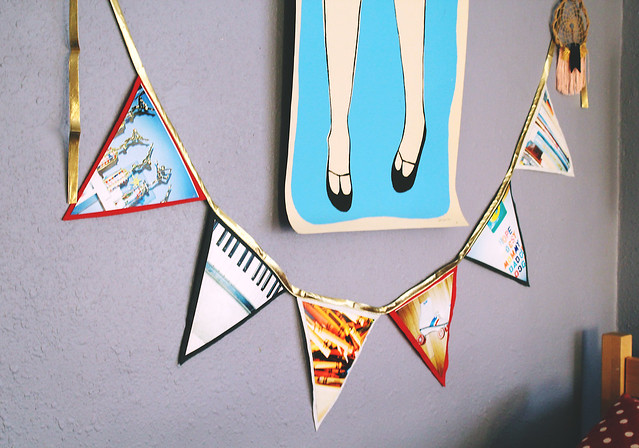

Hope wasn't home when I was stitching all of this up, so when she walked into her room, it was a total surprise. Her response? "Can I keep it?!" Of course, silly. This DIY is for you. Now to figure out a solution for all those Legos... xo.

**If you are interested in owning your own Canon printer, Canon is running a special right now! The PIXMA iP8720 (the printer I almost ALWAYS use) is on sale for $50 off until February 14th, and the SELPHY CP910 is on sale for $94.99 (I used it in this post) until February 14th. I never realized how much I would use a printer in crafting and gifting until I owned a nice one!
cute!
ReplyDeletexx nikki
www.dream-in-neon.com
Awe, what a beautiful idea. 12 is a hard age, I remember I couldn't figure out what music I should be listening to. You're doing a wonderful job at being a mum!
ReplyDelete<3
Emory
helloscarlettblog.com
I know it's off topic, but I live what you did with the hanger and the print - so clever!
ReplyDeleteSuper cute with the photo pendants :)
That is such a cute idea! -Hanna Lei
ReplyDeleteA realy wonderful idea and DIY!
ReplyDeleteI love it ❤.
Greetings & Love & a wonderful weekend
Ines
www.eclectichamilton.de
Love the retro feel!!
ReplyDeleteFabulous idea :)
ReplyDeleteLoving this!!
ReplyDeleteThis project looks so freakin' professional I can hardly stand it! Absolutely love it!
ReplyDelete-Linds
AMAZING IDEA!
ReplyDeletewww.agoprime.it
That is a really good idea. Super cute!
ReplyDeleteI am obsessed with the art hanging in the hanger! Where'Oh'Where did you get that??? I will also be making a banner like this for my daughter Finley's room!
ReplyDelete